You Gonna Eat All That?

A fork in one hand, a pen in the other.

My Photo
Name:
Location: Virginia, United States

(Biscuit Girl)

Saturday, January 05, 2008

Challah Bread

Feeling better from the disc problem in my neck, I'd been anxious to get back into the kitchen and bake. The only major obstacle I had was not being able to move my Kitchen Aid mixer from the cabinet up to the counter top as my doc won't let me lift more than 10 pounds. And that mixer is a heavy beast.

Mom is still here helping us out while I'm healing up or should I say she's trying to keep me from over doing things. I'm not a good patient and have been keeping her and Jim on their toes. But today I had Jim hoist the mixer onto the counter and they turned me loose in the kitchen......whee!

I had three recipes in mind. One was the challah bread, another was a burnt sugar pound cake using some of my newly acquired vanilla beans and the last one was some dog biscuits for Miss Sophie and her Tennessee cousins that would be safely transported home via mom.

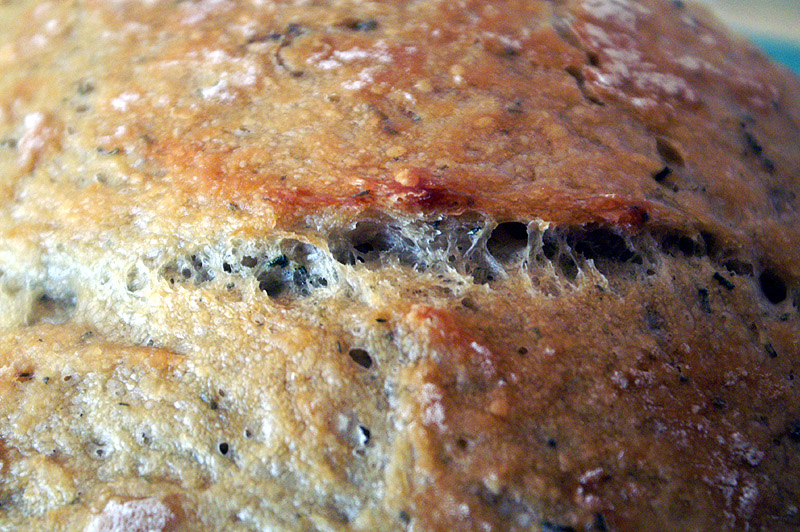
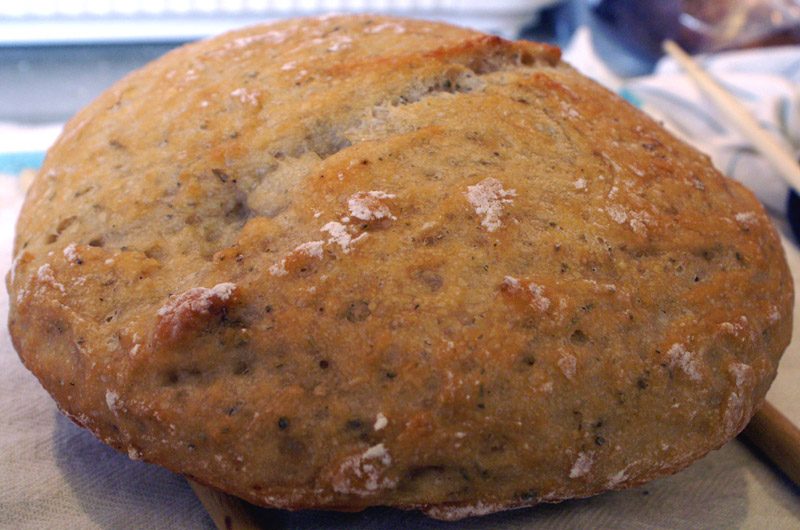
The challah bread was so easy to put together. I was only worried about how well I'd braid the dough. But not to fear....with mom holding one end of the dough, I braided with ease.We haven't had any yet and how we've managed not to tear into it is still a mystery. But have no doubt, there will be some French toast made with it tomorrow or Monday.
Challah Bread Recipe
4 cups unbleached bread flour

2 tbsp. sugar

1 tsp. salt

1
1/3 tsp instant yeast
2 tbsp. vegetable or canola oil

2 large eggs, slightly beaten
2 large egg yolks, slightly beaten

3/4 cup + 2 tbsp. water

2 egg whites, whisked until frothy
Sesame or poppy seeds for garnish (optional)


Stir together the flour, salt, sugar, and yeast in the bowl of your mixer. In a separate bowl, whisk together the oil, eggs, and yolks, 3/4 cup + 2 tbsp. water. Pour the egg mixture into the flour mixture. Mix on low speed with the paddle attachment until all ingredients gather together and form a ball. Add more flour or water if needed.


Switch out the paddle attachment for the dough hook and knead the dough on medium speed for about 6 minutes, sprinkling in more if needed to make a supple , but not sticky dough. (it may feel slightly tacky to the touch)


Lightly oil a large bowl (I use a rising bucket with a lid that seals). Form the dough into a ball and place it in the oiled bowl. Roll it around a little to coat it with the oil. Cover and let it sit at room temperature for 1 hour.


Remove the dough from the bowl and knead for 2 minutes to degas. Re-form the dough into a ball and place it back into the bowl, cover and let sit again at room temperature for another hour. It should grow to 1 and 1/2 times it size.


Remove the dough from the bowl and divide it into three equal parts. Form each into a ball, cover with a towel and let rest for 10 minutes.
Roll out all three pieces into equal length strands, thicker in the middle and slightly tapered at the ends. Braid them, tucking in the ends underneath. Line a cookie sheet with parchment paper and transfer the bread to the pan. Brush the loaf with the egg whites then mist it with spray oil. Cover it loosely with plastic wrap.

Proof the bread at room temperature for 60-75 minutes or until the dough grows to 1 and 1/2 its original size.
Preheat the oven to 350 with the oven rack placed on the middle shelf of the oven. Brush the loaf again with the egg whites and sprinkle on the sesame or poppy seeds if you are using them.

Bake the loaf for 20 minutes then rotate the pan 180 degrees and continue baking for another 20-25 minutes. When done the bread will have a rich golden color and when probed with a thermometer will read to 190 degrees in the center. Transfer the bread to a cooling rack for at least one hour before serving.

Labels: ,

Thursday, September 13, 2007

Peach Upsidedown Cake - revisited

Way back in the early days of my blog, I made a wonderful peach upsidedown cake. Two years later I find myself lusting over another batch of farm fresh peaches. Several recipes looked interesting but it was the same cake from July 2005 that spoke to me. This time I halved the peaches whereas last time I sliced them. Both ways work well and are equally delicious.

Peach Upside Down Cake
¼ cup butter

½ cup packed light brown sugar
¼ teaspoon ground nutmeg
5 fresh peaches - peeled, pitted and halved
½ cup butter, softened
½ cup white sugar
1 egg
1¼ cups all-purpose flour
2 teaspoons baking powder
½ teaspoon salt
½ cup milk

Melt ¼ cup butter or margarine in an 8 inch square pan. Sprinkle with brown sugar and nutmeg. Arrange peach halves, cut side down, in pan.

In a large bowl, cream the butter and sugar until light and fluffy. Beat in egg. Stir together flour, baking powder and salt. Add flour mixture to creamed mixture alternately with milk, beating well after each addition. Spread batter over peaches.

Bake at 375 degrees F (190 degrees C) for 35 to 40 minutes, or until lightly browned on top. Remove cake from oven, and let stand in pan for 5 minutes; invert onto serving platter. Serve with whipped cream.

Labels: , ,

Tuesday, September 11, 2007

Nice Buns!

Anytime I need to relax, I bake. And last weekend after another stressful week at work I found myself looking through my recipes for something to bake. My choice: Hamburger Buns. I took this recipe from fellow blogger Joe from Culinary in the Country.

They are super easy to make and took less than three hours from start to finish. Tonight we're having them with some veal florentine burgers. Last night Jim had one with some left over pork stew he made (which was delish but we forgot to get pictures).

These are the plain buns:

These are the seeded ones:And lastly, here is the recipe:
Hamburger Buns

1 cup milk
1 cup water
2 tablespoon sugar
2 tablespoons butter
1 1/2 teaspoon salt
5 1/4 cups all-purpose flour, divided
2 1/4 teaspoons instant yeast
Egg wash( 1 large egg yolk + 1 tablespoon water)

In a small saucepan, add milk, 1 cup water, sugar, butter and salt. Heat over low just until the butter melts - cool to lukewarm.

In a medium bowl, whisk together 3 cups flour with the yeast.

Pour the milk mixture into a large mixing bowl. Mix in the flour/yeast mixture, 1 cup at a time, until all 3 cups are in, and beating until smooth. Stir in enough of the remaining flour to make stiff dough.

Scoop the dough onto a lightly floured surface. Knead until smooth and elastic (about 8-10 minutes), adding enough of the remaining flour to prevent the dough from sticking to your hands. Move dough into a large bowl lightly coated with cooking spray. Cover and let rise until doubled, about 60 minutes.

Uncover and punch down the dough. Evenly divide into 12-16 pieces, depending on how large you want the buns to be. Form each piece into a tight ball and place about 2" apart on a parchment lined baking sheet - you may need to use 2 sheets depending on the size. Slightly flatten each ball. Cover and let rise until doubled - another 30 to 45 minutes.

Preheat oven to 400. In a small bowl, whisk together egg yolk and water. Gently brush egg wash over each bun.

Bake about 20-25 minutes, until golden and they sound hollow when tapped on the bottom. Transfer to a wire rack and cool completely.

Labels: ,

Saturday, July 28, 2007

Lobster Risotto

I've been neglecting my blog again but I hope this is the last time I do so. I've got all sorts of yummy recipes and pictures just waiting for me to post them. So baby, I'm back! And with style.

Usually when I have a Friday off, Jim and I take advantage of it by planning to meeting in DC for dinner. But yesterday we decided to have a nice dinner at home. I had all day to prepare it so I didn't feel rushed and wanted to do something I normally wouldn't do on a average work night.

A while ago I bought some frozen lobster stock and wanted to use it in the meal somehow. A soup first came to mind but what won out was a risotto made with it rather than the usual chicken stock. And why not make it totally indulgent and add some lobster claws and morel mushrooms? A quick trip to Slavin and Sons for the lobster and I knew somewhere in the pantry I had a bag of dried morels.

But I wanted a veg to go with it. That's when I remembered that I had the mother of all yellow squash in the fridge. Last week the Egg Man* stopped by and tossed this baby in with my order 'just because'. I'd been scratching my head over what to do with the mutant beast and then it came to me......fried it up like a you would a green tomato. A little cornmeal, salt and pepper to coat and a quick fry in the skillet. Yum!
*This is actually a new Egg Man, the former one I wrote about a couple of years ago passed this past November.

Jim came home a few minutes earlier than planned which worked out great as I was in the midst of cooking the risotto and had no free hands to cook the squash. He jumped into action and the meal came together beautifully. I tossed some of the small bits of lobster meat into each serving and placed a whole piece of claw meat on top, plated up the fried yellow squash and put it all on the table. Add a nice bottle of Aria Cava and dinner was ready.
And it was Dee-lish-us! I'll post the recipe for the risotto tomorrow.

Labels: , , ,

Saturday, July 07, 2007

Roast Chicken

By Biscuit Boy

Biscuit Girl has been busy with work and home lately, so I'm helping out a little bit. One thing I made a week or so ago was a roast chicken. A friend at work recommended this. This was from Thomas Keller's recipe, roasting at high temperature for about an hour, giving you crispy skin and quick chicken. You can find this recipe on Epicurious. It's really tasty. Preheat the oven to 450 degrees. You take a whole chicken, say 2-3 pounds, rinse it off, then dry it thoroughly inside and out. This allows the skin to become extra crispy. Salt the outside of the chicken with about a tablespoon of Kosher salt. Then pepper and put it in the oven for about an hour. Toward the end, it will be sizzling and popping, making a mess in the oven and making you wonder if it will catch on fire. According to my friend who recommended it, it won't.

After about an hour (more or less, depending on the size of the chicken, use a probe thermometer to make sure it's done), pull it out of the oven, sprinkle with about a tablespoon of fresh thyme, and baste with the juices in the pan. Let it rest for 15 minutes, then carve.

Keller recommends serving it with butter and dijon mustard. I can't see needing the butter, it is juicy as it is. But the mustard would be a nice touch. We served it with roast potatoes and stir-fried snow peas. And it was so good that I'm making it again tomorrow night.

Labels: ,

Tuesday, June 19, 2007

Cumin Crusted Fish

This dish is still a work in progress. We're trying to replicate a dish we used to get at a place here in town. Once the chef left for another place, this and several other dishes went as well. It was a cumin crusted spicy fish and it was delish.

The picture above was our first attempt. Not bad, but not the dish we remember so well. But at least it gave us an idea of how to tweak the recipe for our next try. This version had me coat the fish with a beaten egg white, then dredged in a mixture of flour, cumin and salt. Then a quick toss in a skillet with some oil and garlic and topped with fresh cilantro.

While it smelled strongly of cumin, I think the flour supressed the flavor from coming through. The cumin flavor was very light. We did get the texture of the coating right on target. So now we're working with the actual flavoring. Maybe less or no flour, perhaps a pinch more salt, who knows. We'll eventually get it all figured out and when we do I'll repost with the recipe.

Labels: ,

Thursday, June 14, 2007

Plum Delicious!

Jim picked up some plums last week at the market, handed them to me and said, "Could you make me a plum cobbler?" How could I say no, the plums looked great and I've never made a cobbler with plums before. Strawberries, peaches, and blackberries, yes, but plums, no. I also saw it as a way to learn to like plums. Not that I dislike them but because I've never been a big fruit eater. And if a cobbler is the vehicle I need to learn to better enjoy a fruit, then I'll gladly make the effort.

I used a fairly simple recipe for the cobbler part.......Bisquick. Yeah, I know but it's easy and quick. The only thing I added to the basic recipe was some cinnamon.

Plum Cobbler
Topping:

2 cup Bisquick

1/2 cup milk
2 tbsp sugar

1/4 tsp cinnamon


Filling:

12 plums, pitted then cut them into 8ths

1 cup sugar
3 tbsp of cornstarch

1 tsp vanilla
pinch of cinnamon

Mix all the topping ingredients together and set aside. Mix all the filling ingredients, stirring well. Pour filling into an 8" x 8" baking dish.

Using a large spoon, drop topping over the filling. Bake in a 400 degree oven for 20-25 minutes or until topping is golden brown and sounds hollow when tapped.


Serve warm with your favorite flavor of ice cream. (we had black walnut on hand and used it.)

Labels: , ,

Wednesday, May 30, 2007

Bialy Recipe and Pictures

Oops! Meant to post the pictures on Monday night. Better late than never!
The bialy's turned out great. Light and airy with just a touch of chewiness to them. We couldn't resist ourselves and split one while it was still warm, slathered on some butter and devoured it.


The remaining ones will be breakfast the rest of the week. It's gonna be a good week.
These are the bialy's before they were baked.

These are the bialy's just after I took them out of the oven. Don't they look good enough to eat?

I did make two changes to the original recipe. First, I reduced the quantity from 2 dozen to 1 dozen. This produced a nice sized bialy. Making 2 dozen made ones that were too small for me. Second, even though it's still listed in the ingredients, I omitted the salt from the topping. I simply didn't care for it as I'm used to just having the onion and poppy seed taste.

The only other thing I would add is that during the step where you make the indentation in the center, be sure you press down firmly. I gave it a nice push but as you can see in the pictures, it puffed back up. You want a nice flat center so the poppy seeds and onion have a little nest to sit in when they are baked.

Now, go make yourself some bialy's.


Bialy recipe - Makes one dozen

Filling:
2 tablespoons onion flakes
2 teaspoons poppy seeds
1 tablespoon vegetable oil
1 teaspoon salt

Dough:
4½ cups bread or all-purpose flour
5 teaspoons sugar
2 teaspoons salt
1 package dry yeast
1¾ cups hot water (about 110 degrees F)
1 baking sheet, sprinkled with cornmeal or covered with parchment paper

To make the filling, soak the onion flakes in water for about 2 hours. Drain and press out the water with a paper towel. If the onion flakes are coarse, mince fine in a food processor or blender. Combine in a bowl with the poppy seeds, oil, and salt, and set aside.

To make the dough, measure 3 cups flour into the mixing or mixer bowl and add the dry ingredients. Stir to blend. Form a well in the flour and pour in the hot water. With a wooden spoon pull the flour from the sides into the middle and beat until a medium batter. If using a mixer, attach the flat beater and, with the machine running, pour in the hot water. Add flour, 1/4 cup at a time, until the batter becomes a rough but elastic dough. Attach the dough hook, if using the mixer.

Turn the dough from the mixing bowl and knead with strong push turn-fold strokes; crash the dough down against the work surface occasionally to help develop the gluten. If the dough is sticky, dust with sprinkles of flour. If under the dough hook, the dough will clean the sides of the mixer bowl and form a ball around the hook. If it persists in sticking to the sides, add small portions of flour while the mixer is running. Knead for 10 minutes, until the dough is smooth and elastic when stretched.

FIRST RISING: Place the dough in a greased bowl, cover with plastic wrap, and set aside to double in volume at room temperature, about 1 hour.

SECOND RISING: With your fingers or fist punch down the dough, re-cover, and let double in volume again, about 45 minutes.

SHAPING: Take the dough from the bowl and divide into 4 equal parts. Divide each part into 6 pieces. Roll each piece into a tight ball under a cupped palm. Let the balls rest for 10 minutes under a length of wax paper or a cloth.

With hard blows of your palm or under a rolling pin, shape each ball into a 4 inch circle, about ½ inch thick. Place on the prepared pan.

THIRD RISING: Cover the circles with wax or parchment paper and put aside to rise to slightly less than double, 30 minutes. A baker would say "three-quarter proof."

FILLING: With care not to deflate the outer part of the bialy, push a deep depression in the center with the thumbs. Stretch the dough uniformly outward until the well is at least 1½ inches across, and thin on the bottom. Place about ½ teaspoon of the onion filling in the well.

FOURTH RISING: Cover the bialys with wax paper and allow them to rise until almost doubled, about 25 minutes.

While the bialy’s are rising, preheat the oven to 450 degrees F 20 minutes before baking.

BAKING: Place the bialys on the middle shelf of the hot oven and bake until a light brown, about 15 minutes. Place the baked bialys on a metal rack to cool.

Labels: ,

Monday, April 16, 2007

Pork - 2 Ways

I bought a pork roast and trimmed it out leaving me with a nice little white meat roast and a thin section of dark meat. I decided to marinate each in different marinades.

For the roast, the marinade included pomegranate syrup, 3 dried chipotle peppers, and a Meyer lemon. I didn't add the lemon until it was time to roast the meat but I'm sure it wouldn't have hurt to add it to the marinade from the beginning. This baked at 375 for about 35 minutes.


For the darker cut of meat I went with a little more of an Asian flare with Sesame oil, chunky peanut butter and soy sauce. Since this cut of meat was thin, I sautéed it in a skillet.

I also sautéed some Shanghai tips with some soy sauce and hot peppers to serve with the pork as well as a nice pot of rice. It was a nice filling meal. Both of the marinated meats were distinctly different in flavor but equally good. Jim and I thought the addition of some more hot spice would have been good. His choice: habanero, mine: red pepper flakes or Sriracha hot sauce.

Labels: ,

Thursday, April 05, 2007

Dinner and Reminiscing

Dinner the other night brought back memories of a restaurant that will always be a favorite of ours even though it's been gone for several years. The restaurant was Honolulu, a quirky, immediately welcoming place. For years we drove by it but weren't sure what it was. For one thing, there were no windows, just a brick exterior with a sign over the door that simply said, "Honolulu." We thought it might be a strip club since it had no windows or mention at all on the sign of it being a restaurant.

Then we read something in the paper about this cool tiki bar in our neighborhood called Honolulu .....omg! Who knew? Well, apparently a lot of people except us. But that didn't last long.

One evening shortly after reading the article, we went to check it out. Once inside it was dark, soothingly dark with strains of Don Ho music playing in the background. A tiki bar (with thatched roof) was just inside the front with owner David Chan at the helm. A former bartender at Trader Vic's, David knew a thing or two about cocktails.......very potent, very tasty cocktails. His wife, Anna, would always smile as she greeted you then found a comfy booth or table for you to sit and soak in the tiki atmosphere.


The drinks were unbelievable. One drink, the Flaming Volcano (not us in the picture) for 2 or more arrives at the table in a large bowl-like vessel with a volcano rising up from its center. Surrounding the volcano was a moat of alcoholic delight...rum, rum, and more rum with some fruit juice thrown in. The finishing touch was the 151 proof rum sitting in the top of the volcano that was lit when brought to the table. Oh, you were also given these straws that were about 2 feet long so you could sip from the moat without having to get too close to the flames. Other drinks we enjoyed (many, many times) were the Suffering Bastard (Jim's favorite), the Peach Punch (my favorite), the Scorpion, the Fog Cutter, and the Puka Punch.

The food was old-school Americanized Chinese and it was good. Eggrolls, crab rangoon, hot & sour soup and the Pu-Pu Platter (with flames) were favorite starters. Main dishes like Peking duck (amazingly good Peking duck), Shrimp with lobster sauce, and a myriad of others often graced our table. There was even a dish that was served table side that was set ablaze just before serving as well as a flaming dessert (you see a pattern here, don't you.)

But after 26 years, the restaurant closed. Upcoming construction for the new Woodrow Wilson Bridge claimed the restaurant and several other businesses a few years ago. For months after the announcement of their closing date, crowds of people came to pay homage to this wonderful place. In the last few days, it wasn't unusual to stand in line for 2 hours to get in. And we were among the mourners. Our last trip was two days before they closed. We had a wonderful meal, a drink too many and soaked in the tiki-ness one last time. In all the visits, there was only one bad thing I could say......in the summer months, after a few tiki drinks one would have quite a buzz which wasn't so bad since it was nice and dark and cozy inside. But if you walked outside before 9 pm, it was still light out! How wrong is it to be that buzzed and it still be light out?! It's wrong, so wrong. But it never stopped us from going back for more. They now have a website where you can see pictures of the inside.
So back to our dinner the other night. We made a chicken, rice cake and green bean stirfry finished with a stirfry sauce from none other than Honolulu! You see, when they closed, they decided to market some of their signature items such as Mai Tai mix, salad dressing and stir fry sauce. They even sell tiki glassware and gift baskets so if you need a tiki-fix, check them out. There are also some great pictures of the restaurant before it closed.

But again, I digress. Back to dinner, I thinly sliced the chicken, sauted it with garlic until it was done through, then turned off the heat while I waited for the green beans and rice cakes to cook (I cooked the fresh green beans with the rice cakes in boiling water for about 10 minutes). Once they were done, I drained them and added them to the chicken along with some fresh sliced green onion. Toss with some stir fry sauce, hot pepper flakes, sesame seeds and serve. It was a delicious way to remember a favorite place.

Labels: ,

Thursday, March 22, 2007

Pistachio Cake

Another staff meeting, another wonderful lunch. Last month I posted about the lunches we have at our monthly staff meetings. It's something that we started years ago with soup during the cold winter months and over the years has expanded to every month on the day of our staff meeting.

This month to celebrate Spring, we chose to have salads as our theme. Some were sweet and some were savory and all of them were wonderful! I tried to sneak in a take a picture of the spread before it was completely devoured! Luckily, those who were still in line, stepped aside (but just barely) to let me snap one quick picture. Starting at the bottom of the picture we have taco salad in the red bowl, tuna salad to the left of the taco salad with potato salad just above it followed by hot sauce, chips and cheese sauce (for the taco salad). Just above the chips is Wurst salad with a basket of fresh bread just above it (if you look to the upper left of the cheese sauce there is a tub of fresh Amish butter for the bread). To the left of the bread is a fresh mozzarella a tomato salad. To the left above that is a tossed salad with balsamic dressing and to that right is jello salad and finally at the top of the table on the left is a fruit salad and to the right is a pear-pecan salad. Yes, we eat well at these meetings....very well.

We stopped midway for a quick break which is when I cut the cake. It went quickly. Some folks even went back for seconds. Jim was lucky that I was able to save him a bite.
I'll try to get as many of the recipes for the salads as I can then post them. The Pistachio cake was found in the March Issue of Family Circle. I first saw it while visiting family in Tennessee last month but didn't write it down. Thankfully mom still had it and sent the recipe via e-mail. Here it is:

PISTACHIO CAKE

Cake:
1 box (18.25 ounces) White Cake Mix
1 Package (3.4 ounces) instant Pistachio Pudding Mix
3 Eggs
1 Cup Vegetable Oil
1 can (12 ounces) Lemon/Lime Soda (such as 7 Up)

Heat oven to 350 degrees. Coat two 9"round cake pans with non stick cooking spray.
Line bottoms with parchment paper and spray again.
In a large bowl, beat cake mix, pudding mix, eggs, vegetable oil and soda on medium-high for 4 minutes. Scrape down sides of bowl after 2 minutes.
Equally divide batter between prepared cake pans. Bake @ 350 for 35 minutes or until a toothpick comes out clean. Cool layers in pans for 15 minutes on a wire rack. Turn layers out on to rack and cool completely.

Frosting
1 Package (3.4 ounces) Instant Pistachio Pudding mix
1 1/2 cups Milk
1 Container ( 8 ounces) Frozen Whipped Topping thawed
1/2 Cup Pistachio Nuts Chopped for Garnish

In a large bowl, beat pudding mix and milk for 2 minutes on medium-high speed. Fold in whipped topping.

Place 1 cake layer on a serving plate and frost top with 1 cup of frosting. Place remaining layer on top and frost top and sides. Garnish with chopped nuts. Refrigerate for at least one hour before serving. Store in refrigerator. 16 Servings

Labels: , ,

Tuesday, March 13, 2007

Mussels

Once a month I have to get an allergy shot. And as luck would have it, Slavins & Sons Seafood is a short drive from the doctor's office. I usually plan to stop by there after my shot to get some fresh fish or seafood for dinner. The fresh mussels have been so good that for the past few months, that's all I've gotten. And can you blame me? Just look at those plump buggers.

Jim's come up with a broth to steam them in that is absolutely wonderful. Basically it's olive oil, garlic shallots, thyme and a nice dry white wine. He sautees the garlic and shallots (both minced) in the olive oil until the shallots are translucent. Then he adds a pinch or two of freshly dried thyme and a cup of wine. Toss in the mussels, cover it up and steam for 5-8 minutes. Pour it all into a big bowl and serve.

Lately we've also had freshly made oven fries and crusty bread on the side. The bread is for sopping up all that yummy, yummy broth.

Labels: ,

Friday, March 09, 2007

Chicken Enchilada Soup

Sorry it took so long to get this recipe posted. If you remember, I was going to post it just after I wrote this. This soup is so easy to make and very tasty.

Chicken Enchilada Soup

1 small onion, chopped
1 clove garlic, crushed
4 oz. chopped green chilies
14½ oz. beef broth
10¾ oz. chicken broth
10¾ oz. cream of chicken soup, condensed
6¾ oz. cooked chicken breast, chopped
1½ cups water
1 tbsp. steak sauce
1 tsp chili powder
2 tsp Worcestershire sauce
1 tsp. ground cumin
1/8 tsp pepper
3 cups shredded cheddar cheese
1 can whole corn, drained

Sauté onion and garlic in 2 tbsp. hot oil in a large pot or Dutch oven. Add remaining ingredients EXCEPT the cheese and corn. Bring to a boil, cover and reduce heat. Simmer for 1 hour. Add cheese and corn, simmer 10 minutes.

I’d recommend serving it with fresh cornbread.

Labels: ,

Sunday, February 18, 2007

New York Bagels, Kaiser Rolls and Salt Sticks

I'm in Knoxville this weekend visiting my family and whenever we get together, food is high on the list of things we do. Whether it's getting everyone together to eat at a restaurant or at home, we always find time to spend over a plate of food. This trip, instead of cooking a big meal together, we baked bread. Specifically bagels, kaiser rolls and salt sticks.

Having New York roots, bagels are one of those foods for which there is only one true 'bagel'...a good NY deli bagel. Crusty, chewy and dense. Not like the ones you find in the freezer case at the stores or in the bread aisle which are usually light and fluffy. Blech.....

Finding a true NY style bagel is pretty hard to do in Tennessee and for that matter, not much in where I live in Alexandria has met my standards yet. But after reading several other fellow bloggers rave about the bagel recipe in The Bread Baker's Apprentice, I was curious enough to check it out. I got a copy of the book from the library (not hard to do since I work in one) and looked over the book. The first part of it is filled with basics of bread baking and I learned quite a few things. I also liked the look of the bagel recipe and about a dozen others so I went out and bought the book. That was a year ago. The poor book has been sitting on my cluttered bookshelves until just recently when I thinned out the collection.

Intrigued by my semolina bread, my brother and sister were interested in baking some bread this weekend when I came down to visit and I knew immediately that bagels would be on the list of breads to make. I also scanned a Kaiser roll recipe in the book and threw that one in the mix as well. My dad's favorite breakfast is fried egg on a kaiser roll and I wanted to see if I could re-create an authentic roll for him.

My brother and sister came by our mom's house yesterday around noon and we baked until close to 7:00. We had baked 8 salt sticks (which we also call snake sticks) and 8 kaiser rolls. We put together a starter for the kaiser recipe but decided to try another recipe my sister found that was for the salt sticks and kaisers, a two-fer! While on the small side, the taste was there. Next time instead of the dough being divided into 16, we'll divide it in 8 and just make salt sticks.

And we had two dozen bagels were sitting in the fridge awaiting a nice hot water bath the next morning before being popped in the oven. A sample bite of a salt stick and a kaiser left us pleased with our handiwork. We couldn't wait until breakfast. This morning we finished making the bagels and could hardly wait for them to cool before we tore into one, slathered it with butter and grunted our approval. These were NY bagels and they were damn good!

But we still had the starter in the fridge from the first Kaiser recipe. I decided to go ahead and make the rolls so we could compare the two recipes. I made them bigger as well so a whole fried egg can easily sit on the roll. They came out really nice and smell wonderful but we will wait til tomorrow morning to try them If I can wait that long.
As soon as I get home, I'll try to get the recipes posted as well.
Here are some more pictures of the bounty we baked:
Salt Sticks (aka Snake sticks)
Kaiser Roll

Bagels

Labels: , , ,

Monday, February 12, 2007

Osso Buco

Yesterday was Jim's birthday so I got busy in the kitchen making him Osso Buco. We've talked about making this for months but never got around to it. On Friday I saw some veal shanks on sale at the store and picked up a pack. When I got home I perused some of my recently thinned out cookbook collection and found a recipe by Tyler Florence the looked good.

It went together very easily and smelled incredible as it cooked. Sophie kept coming into the kitchen with her nose pointed towards the stove and sniffing the air like crazy. For that matter so did Jim!

I made some instant polenta to go with the dish, but really would rather try to make it the old fashioned way next time. This polenta, on it's own, didn't taste fresh. But once we poured some of the osso buco sauce on top, it tasted much better. Hell, stewed skunk would have tasted good with the sauce. It was rich, hearty and bursting with flavor. I think we dunked about half a loaf of bread into it. We also has some Brussels sprouts on the side.

I didn't make the gremolata as I realized too late that I didn't have all of the ingredients, but it really wasn't missed. The dish was so amazing and one recipe I will happily make again.

OSSO BUCO WITH GREMOLATA – by Tyler Florence

Serves 6 to 8

INGREDIENTS
1 cup all-purpose flour
Sea salt and freshly ground black pepper
4 pieces of veal shank for osso buco
Extra-virgin olive oil
3 tablespoons unsalted butter
1 onion, diced
1 celery stalk, diced
2 carrots, diced
1 lemon, zest peeled off in fat strips with a vegetable peeler
4 garlic cloves, minced
2 bay leaves
1/4 cup chopped fresh flat-leaf parsley
1 bottle dry red wine, such as Cabernet Sauvignon
1 (141/2-ounce) can low-sodium beef broth
1 (28-ounce) can whole tomatoes, hand-crushed

Gremolata:
1/4 cup pine nuts, toasted
1 anchovy fillet
2 garlic cloves
Zest of 1 orange, finely grated
2 tablespoons chopped fresh flat-leaf parsley

DIRECTIONS
Put the flour in a large shallow platter and season it with a fair amount of salt and pepper. Get in the habit of always tasting your flour; once it coats the veal it is harder to adjust the seasoning. Dredge the veal shanks in the seasoned flour and then tap off the excess (extra flour will burn and make the dish off-tasting).

Heat a large Dutch oven over medium heat and hit it with a 3-count drizzle of oil. Add the butter and swirl it around the pan to melt. Sear the veal shanks, turning carefully with tongs, until all sides are a rich brown caramel color. Drizzle with a little more oil if needed. (Do this in batches if the shanks are big and look crowded in the pot.)

Remove the browned veal shanks to a side plate. There will be a lot of flavor left over in the bottom of the pot. You’re going to use that to create your sauce.

Preheat the oven to 375F. Using the same pot, sauté the onion, celery, carrots, lemon zest, garlic, bay leaves, and parsley over medium heat. Cook the vegetables down until they start to get some color and develop a deep, rich aroma. Season with salt and pepper; add a little oil if needed.

Nestle the veal shanks back in the pot. Pour in the wine and let it simmer down for 20 minutes, until the wine has reduced by half. Reducing is key for intense flavor. Add the beef broth and tomatoes and stir everything together. Cover the pot and put it in the oven. Braise for 1.5 hours. Then remove the cover and continue to cook for another 30 minutes. The sauce should be thick and the veal tender and nearly falling off the bone.For the gremolata, mash the pine nuts, anchovy, and garlic together in a mini chopper or with a mortar and pestle. Fold that into the orange zest and parsley. Scatter the gremolata over the Osso Buco before serving.

Labels: ,

Sunday, February 11, 2007

Semolina Bread

I just made the best looking bread ever! I was doubting myself there for a while but I kept going and when the dough was finally kneaded I knew I was on to something good. And this bread kicks ass.

Many years ago when I lived in Nashville, I discovered sesame semolina bread. It was love at first buttery bite. And every now and then I still get a craving for it. My most recent craving was sparked last while I was trying to get over a nasty little cold. I wanted something bready but couldn't quite put my finger on what I wanted. That's when I saw a picture of semolina bread called Pane Siciliano in The Bread Baker's Apprentice. That was all I needed to get the gears in motion. On Friday I was finally back among the living and we were in need of groceries so I headed to the store. One my list, semolina flour.

Last night I began to really look at the recipe for and realized it was going to take 3 days to put together. Rats. I didn't have have three days but I did see another recipe online that only took 2 days. So I struck a compromise by using the recipe for the 2 day version but shaped the bread like the Pane Siciliano.

But I wasn't quite sure how it would turn out when I first started. For one thing, the started didn't look right. It was too firm not loose like the recipe called for but I went ahead and set it to rest overnight anyway. By morning, it was about three times it's size but still looked too dense. I still plowed ahead and once I had the dough mixed and partially kneaded in my mixer, I turned it out onto the counter and began to knead it by hand. I knew almost immediately that what I had was spot on. After a few minutes of kneading I had what was just about the most perfect dough I've ever put together, silky smooth and elastic. An hour of rising provided me more confidence that the bread was going to turn out good. I punched it down, divided it into 4 parts and rolled it out, rolled it up then coiled it from opposite ends to form an "S".

Two loaves got egg washed and sprinkled with sesame seeds and the other two just got egg wash. A second rising and then they were baked.


The result: amazing! Half of one sesame loaf is already gone. Thankfully I now have starter on hand so I can make more in just one day!

SEMOLINA BREAD

Starter
1/4 cup warm water (105°F. to 115°F.)
1/4 teaspoon dry yeast
3/4 cup plus 4 teaspoons water, room temperature
2 1/2 cups unbleached all purpose flour

Bread
2 1/2 cups warm water (105°F.°F. to 115°F.)
2 1/2 teaspoons dry yeast
3 3/4 cups unbleached all purpose flour
3 3/4 cups finely ground semolina flour
2 teaspoons sea salt
Additional semolina flour

For Starter:
Combine 1/4 cup warm water and yeast in medium bowl. Let stand until yeast dissolves, about 10 minutes. Stir in 3/4 cup plus 4 teaspoons room temperature water. Add flour in 3 additions, stirring well after each addition Stir until mixture has consistency of thick sticky dough, about three minutes. Light oil large bowl. Transfer starter to a bowl. Cover with plastic; let rise at cool room temperature until tripled in volume (starter will be slightly wet and thick), at least 6 hours and up to 24 hours. (Can be made 5 days ahead. Stir down starter, cover and chill. Bring to room temperature before using.)

For Bread
Pour 2 1/2 cups warm water into large bowl of electric mixer fitted with paddle attachment. Sprinkle yeast over; let stand until dissolved, about 10 minutes. Measure 2/3 cup starter (reserve remainder for another use). Rub between fingers, allowing starter to drop into yeast mixture (starter will be stringy). Beat until some of the starter dissolves. Combine flour, 3 3/4 cups semolina and salt in large bowl. Add to yeast mixture in 3 additions; beat until incorporated. Turn out unto floured surface; knead until smooth and elastic, about 6 minutes.

Oil large bowl. Transfer dough to bowl, turning to coat with oil. Cover bowl with plastic. Let rise in warm draft-free area until doubled in volume, about 1 hour.

Butter 2 heavy large baking sheets. Punch down dough. Divide into 4 pieces. Cover 3 pieces with clean towel. Roll remaining piece on floured surface to 14x8 inch rectangle. Starting at 1 long edge, roll up dough jelly roll style. Press ends and seam to seal. Coil the dough from opposite ends in opposite directions to form an "S" , repeat rolling and shaping with remaining dough pieces. You can apply an egg wash and cover the bread with sesame seeds if you like.

Cover shaped dough with clean towel. Let rise in warm draft-free area until doubled, about 45 minutes. Preheat your oven to 450°F. If you are using baking stones, let them sit in oven for 30 minutes once it reaches 450 to assure even heating.

Place 1 baking sheet on each stone. Bake until bread is golden brown and sounds hollow when tapped on the bottom, alternating sheets between racks halfway through baking, about 25 minutes. Cool bread on racks. Makes 4 small loaves.

Labels: ,

Monday, February 05, 2007

Something to hold you over...

...while I recover from a nasty cold. I hope to be back posting yummy recipes soon including this lovely rolled pork tenderloin we made a couple of weeks ago. The filling is spinach, Myzithra (also spelled Mizithra) cheese, and mushrooms.Today, with no sense of smell or taste, I bravely made beef stew. When Jim got home from work, he made cornbread (in an iron skillet, of course) to go with it. Didn't get pics but there are leftovers so I'll snap a shot then. It was warm and filling and just right for a cold night like tonight.

And those of you waiting your cookbooks, I will try to get them mailed this week once I feel better.

Labels: ,

Thursday, December 21, 2006

Pork Tenderloin with Apples and a Pomegranate Glaze

I promised you a food related post and here it is. Last weekend while browsing the aisles in Trader Joe's I came across something new....Pomegranate Glaze. Ready to use. How easy is that? At the time I had no idea how I would use it. I figured that would come to me later.

And later was the next day. In our fridge was a nice little pork tenderloin just begging for me to use it in my experimentation of this new glaze. A quick rummage in the fridge also produced an apple. Hmm..... An idea was born.

After cleaning up the tenderloin, I sliced the apple into about 1/2 inch rings (it was a BIG apple). I placed four rings in the bottom of a baking dish, placed the tenderloin on top of the rings then added three more apple rings to the top of the tenderloin. A generous drizzle of glaze topped the dish. Into a 350 degree oven until my trusty probe thermometer told me it was done.

Also added to the oven were some potatoes that were cut into chunks and seasoned with a little salt and pepper and some olive oil. Once both the potatoes and the tenderloin were done, I did a quick sautee of Brussels sprouts which I seasoned with some garlic and soy sauce. Voila! Dinner was served.

We head to Tennessee on Saturday to spend Christmas with my family. Lots of good food will be served and I'll have the camera ready to capture all the mouth-watering meals. Three things I know for sure will be on the menu, first of which is Mom's Christmas Lasagna (see the end of the second paragraph). The next day my brother is fixing a pork roast dinner that I will be helping with by making risotto. Then the following day, mom is making one of my favorite dishes, sauerbraten. She doesn't make it very often which is one of the reasons it's such a treat not to mention pretty darn tasty. And of course, whenever Jim and I see my nephew Steven, there's bound to be a trip to the sushi bar. Nicknamed Eel-Boy, Steven's enjoyed sushi since he was about 11 or 12 with Eel being his favorite, thus the nickname. Although he's an adult now so we upgraded his nickname to Unagi-Man. Sounds much more mature......doesn't it. hehe

So stay tuned! Pictures and posts will be aplenty over the next week (as will a few extra pounds.....thank goodness my water aerobics class starts the next week)

Labels: ,

Sunday, December 17, 2006

Going to the dogs

Where has this month gone! I realized just the other day that I last posted on Dec 1st and here it is 2 weeks later. Between several projects at work and the upcoming holidays, time's been just whizzin' by.

Today I finally had time to make a batch of dog biscuits for the family pets. Between Sophie, my parents two dogs (Frazier and KC), my in-law's two (Java and George) and my sister's dog (Walker), we got a mess 'o hounds.


I bought a bag of biscuit mix at a store in New Syrmna Beach while we were on vacation. There's a cute little place called Silly Willy's on Flagler Ave. It's a regular stop for me whenever we're down there.

The mix went together in a snap and before I knew it, there were nearly four dozen little dog biscuits on the cookie sheet ready to go into the oven.
Sophie gave them her paw of approval. Let's hope there's still some left by the time we get to TN this coming weekend. Oh... don't forget to head over to Sweetnick's to see some more cute pups for this week's edition of Weekend Dog Blogging.

Labels: ,

Sunday, November 26, 2006

Seared Ahi Tuna and more No-Knead Bread

While out shopping today I came across a package of fresh ahi tuna that screamed at me to take it home. So I did. And tonight we dredged each piece in sesame seeds, pan seared them for 2 minutes per side and ate them. *burp* They were delicious.

Jim was the chief cook tonight, I merely provided the tuna. He sauteed some stir fry noodles with garlic and green onion and put a some on each plate. Then he carefully sliced the seared tuna and placed each fillet on top of the noodles.
Simple and delicious. Even Sophie enjoyed a nibble or two.

Coming up this week I'll be off from work (woo hoo!) so I'll have time to tinker in the kitchen. There'll be more no-knead bread for certain. The last loaf I made yesterday didn't stand a chance.
We ate most of it before it had a chance to cool. This loaf was slightly different. I added some freshly ground rosemary and dried onion and added it to the flour mixture before I added the water. And who knows what I'll do with the next loaf...... Then later this week Jim's parents and brother are driving up for a belated Thanksgiving visit. We'll have a family Thanksgiving dinner then. On the menu, brined turkey breast, wild mushroom risotto, green beans and fresh baked bread. We'll probably also make a pizza or two on one other night as well as going out. So stay tuned.......

Labels: , ,